A buttery afternoon in Paris – the art of making croissants
A day in Paris, a workshop full of fragrant secrets. Find out how I learned to make croissants at Maison Fleuret – and how you can too.
From dream to dough
I had been dreaming of learning how to make croissants like the ones you taste in Paris – golden brown, crispy and with that characteristic buttery aroma – for years. But where do you begin with something that seems so delicate and precise? I decided to sign up for the croissant-making course at Maison Fleuret.
One sunny afternoon, I arrived at the workshop, tucked away in a side street near the Seine and Notre Dame, with high expectations. The smell of fresh dough hung in the air. Alice, our teacher with a disarming smile, welcomed us around a large wooden table.
After a brief introduction, we got straight to work, folding and cooling the dough repeatedly. Time seemed to stand still. Then, two hours later, came the moment when Alice opened the oven door and the smell of baked butter spread through the room, just as it would in a Parisian bakery just before opening time.
What had seemed impossible at first turned out to be surprisingly achievable. And the best part? You can use the same dough to make endless variations, from pains au chocolat to suisses aux raisins. So roll up your sleeves, clear your work surface and let the smell of warm butter fill your kitchen. In this blog, I'll take you on my Parisian baking adventure, share my best tips, and tell you about the history and legends behind this iconic French pastry.
From grain to croissant: a story of flavour and layers
Before folding our dough and preheating the oven, let's go back to the beginning – to a time when grain was dried in the sun and turned into something like bread.
The cradle of dough – where it all began
Grain was already being cultivated long before croissants existed – around 8000 BC. Initially, the grains were simply roasted and eaten. However, it was the ancient Egyptians who invented dough. They ground the grain, mixed it with water, and either left it to dry in the sun or baked it on hot stones. The ancient Greeks added milk and egg whites, baking something that looked suspiciously like a waffle.
Over the centuries, dough was enriched with sugar, butter, spices and even chocolate. It was a modest beginning with a rich future.
The French fold: Claude Gellée and his butter incident
The puff pastry we know today was not invented in a laboratory or royal kitchen, but by chance. In the 17th century, the French pastry chef Claude Gellée — better known as Le Lorrain — forgot to add butter to his dough. Feeling creative, he decided to fold the butter into the dough, layer by layer.
What emerged from the oven was not a failed pastry, but a light, layered marvel. It was a dough that unfolded during baking to reveal a millefeuille of aroma and texture.
However, it was not until the 18th century that Antonin Carême, France's first 'celebrity chef', refined the recipe. He perfected the technique and gave the dough its elegant structure. From then on, puff pastry was no longer accidental, but a deliberate culinary choice.
The crescent: a shape with a story
The croissant's distinctive shape is not a French invention. In ancient Egypt and Assyria, bread was baked in the shape of a crescent, often as an offering to the gods. In the Ottoman Empire, the crescent moon became a symbol of power.
A biscuit with the same shape appeared in Central Europe in the 13th century: the kipferl, which was often filled with nuts. According to historical records, Catherine de Medici served this pastry at a banquet at the French court in the 16th century. However, as with any popular pastry, there are also intriguing legends surrounding its origins.
The legend of the Siege of Vienna: bakers as heroes
During the Siege of Vienna in 1683, night-shift bakers noticed Ottoman troops digging tunnels under the city walls. They raised the alarm and the attack was thwarted, saving Vienna. In gratitude, Archduke Leopold I granted the bakers' guild certain privileges. To celebrate, the bakers baked a cake in the shape of the Ottoman symbol, the crescent moon. Each bite was a symbolic victory.
Marie Antoinette and her craving for Vienna
Another story attributes the introduction of the crescent shape to Marie Antoinette. The Austrian princess, who was married to Louis XVI, is said to have been homesick for the pastries of her youth. She introduced the Viennese brioche shape to French cuisine – a royal craving that had a lasting impact.
The official arrival in Paris
What is certain is that Austrian entrepreneur August Zang opened the first Viennese bakery in Paris in 1839. His sweet pastries, including the Kipferl, captured the hearts of Parisians.
Around 1850, the pastry was given a new name — the croissant, from the French word for 'crescent moon'. A star was born.
The croissant, from aristocratic pastry to popular breakfast
The croissant did not become a staple of the French breakfast until the early 20th century. Thanks to industrialisation and rising living standards, this pastry found its way into the bourgeoisie's diet.
The first recipe for the croissant feuilleté appeared in the Journal des Confiseurs-Pâtissiers in 1895. In 1915, baker Sylvain Claudius Goy created a recipe that would form the basis for the modern croissant, which at that time contained less butter and sugar and had a higher degree of hydration.
Over the years, the recipe has been made richer: more butter, more sugar, more yeast. And so the croissant grew into a global icon, becoming a staple breakfast item across the world, from Parisian cafés to breakfast tables everywhere.
What goes into a croissant?
Six ingredients. One masterpiece.
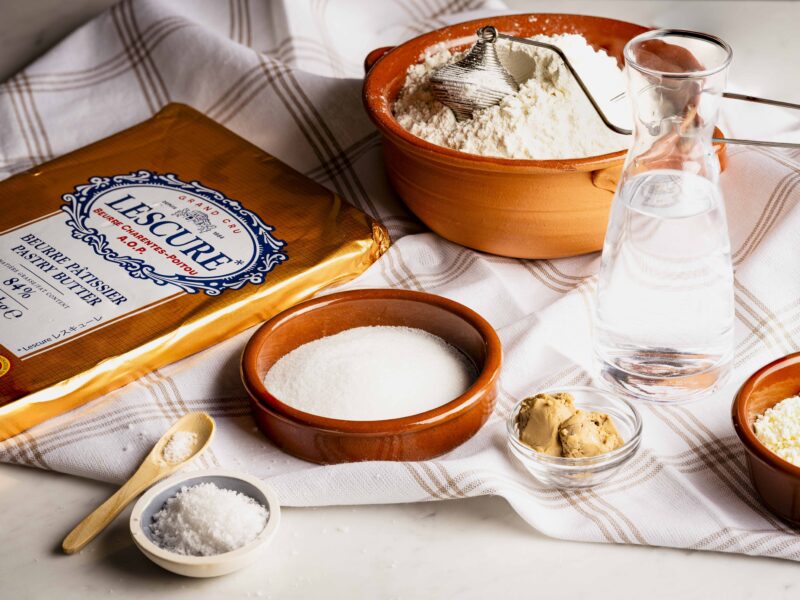
The croissant may be an icon of French elegance, but its secret lies in its simplicity: just six carefully selected ingredients. Each ingredient plays its own part in creating the perfect dough – one that is full of texture, aroma, taste and structure.
Flour:
Use either patent flour or T45 flour, both of which are rich in protein (gluten), ensuring an elastic dough that rises well and remains light. A combination of both is also possible for those looking for the perfect balance.
Liquid :
Milk or water? It may seem like a simple choice, but it has a significant effect on the texture and taste of the dough.
- Milk makes the dough soft and rich with a subtle creaminess that can be tasted in every bite.
- Water, on the other hand, gives the dough a lighter texture and a crispy crust, which is perfect for those who love the contrast between the outside and the inside.
However, the secret of top pastry chefs is that they usually use water as a base and add a spoonful of cream or some milk powder. Why exactly? That remains somewhat of a mystery, but presumably it adds subtle richness and extra depth of flavour without weighing down the dough. It's a clever trick that combines the best of both worlds: lightness and creaminess.
Yeast:
Fresh baker's yeast is essential for a deep, full flavour and good rising.
Top pastry chef Dominique Ansel goes one step further and uses sourdough, which adds a hint of acidity that beautifully balances the rich butter flavour. A croissant with character.
Sugar :
Sugar feeds the yeast and produces carbon dioxide, which is essential for the dough to rise. But sugar's role doesn't end there: it also contributes to the golden-brown colour thanks to the Maillard reaction, in which sugars and proteins combine to form a fragrant crust.
Salt :
Salt is the silent force in the dough. It strengthens the gluten, retains moisture, and adds subtle depth to the flavour. It gives croissants their irresistible soft, springy texture, or 'moelleux'.
Butter :
The star of the show. Use unsalted butter with at least 82% fat content – cream butter is an excellent choice. For a truly professional approach, try touring butter, which is specially developed for making puff pastry. This ensures a light, layered structure that unfolds like a honeycomb when baked.
The shape – straight or curved – is a matter of fat
The shape of a croissant in France is a statement all of its own. Transparency in food is a cultural issue, and this is even reflected in the curve of the pastry.
In the 1970s, the industry – and some bakers – started using cheap margarine instead of butter. To make the difference visible, a convention was introduced:
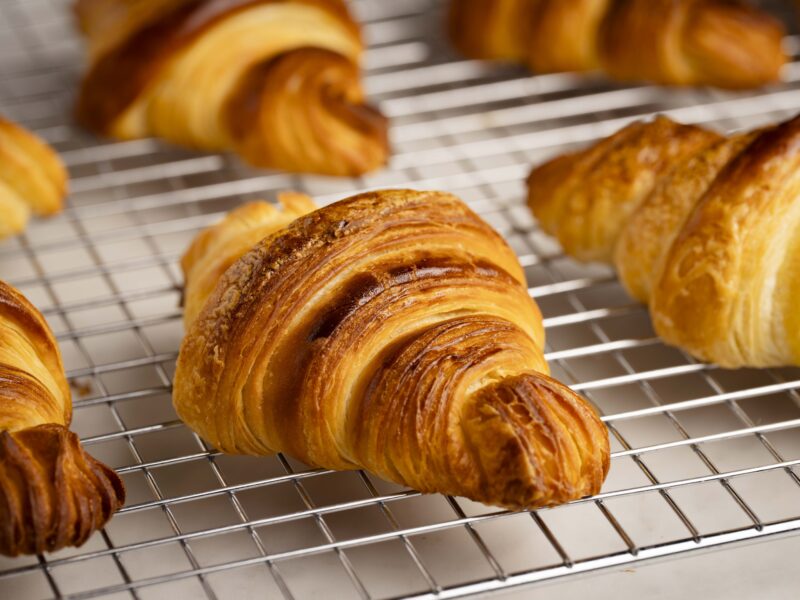
- Straight croissants = made with butter
- Curved croissants = made with margarine.
Today, this rule is less strict: both shapes can be found with either fat. However, those in the know will still check the curve before taking a bite.
Making croissants: an exercise in time and precision
Making your own croissants can be a very satisfying activity, but it does require dedication. There are two crucial things:
- Time: puff pastry needs time to rest. The dough must be given time to cool and relax in order to achieve the desired result.
- Precision: you need to work with cold ingredients, roll the butter into a perfect slice, and fold the dough with surgical precision. Every detail counts.
The perfect croissant – how do you recognise it?
A really good croissant is hard to find. But when you find one, you'll recognise it by the following characteristics:
- Colour: golden brown, with a subtle shine
- Shape: even, with a high centre and pointed ends
- Crispness: it should crumble when you break it – no soggy bits
- Smell: butter, butter, butter
- Texture: a honeycomb structure of light layers and fine air bubbles
How to eat a croissant – like a true Frenchman
The French take their croissants seriously, but they also enjoy them.
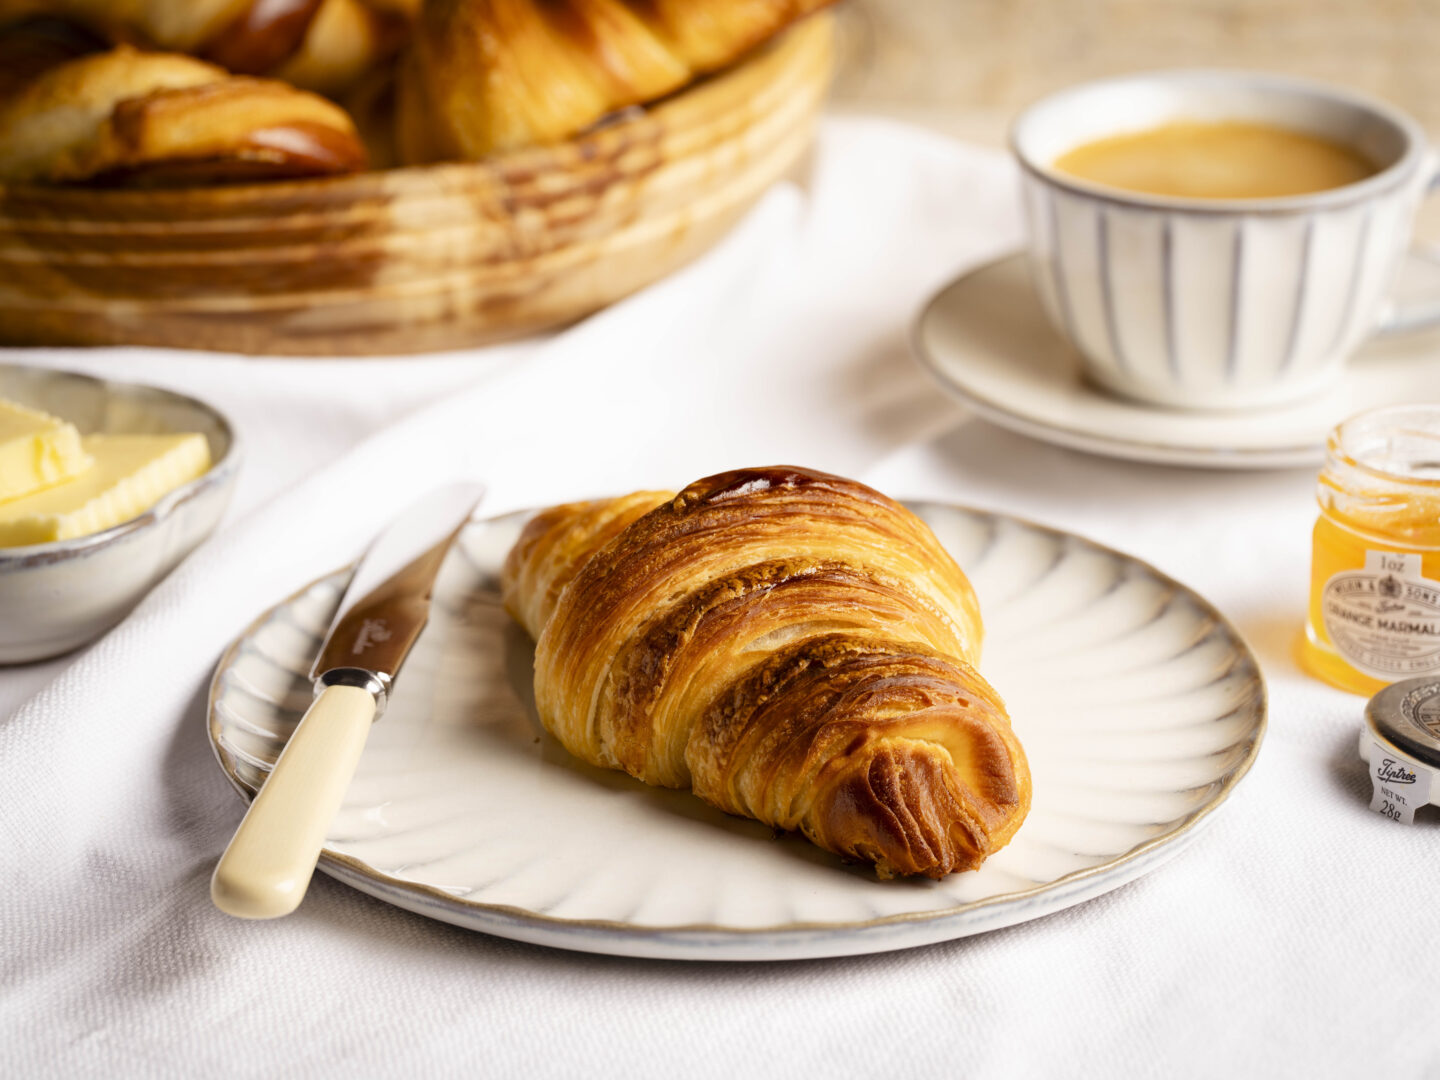
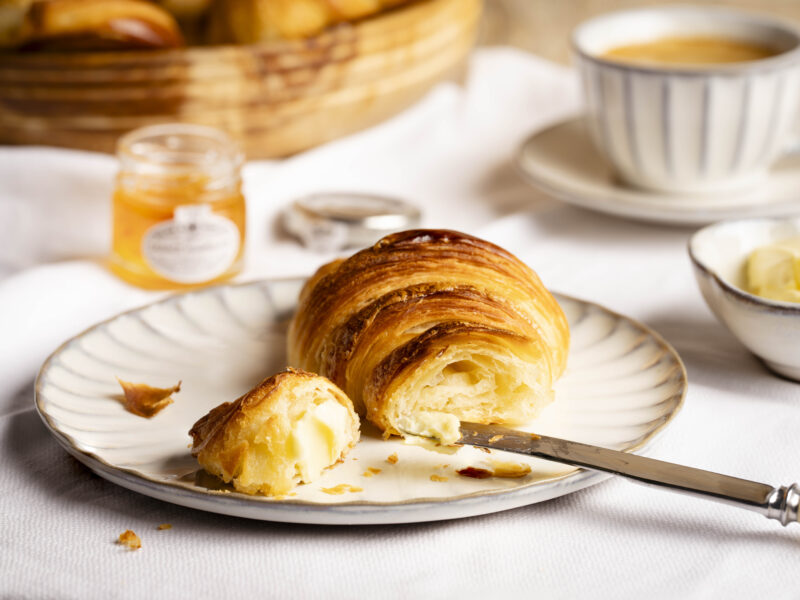
Spread some extra butter on top (yes, really) or a dash of jam and dip it in a cup of steaming coffee or a large mug of hot chocolate. No knife, no plate – just enjoy!
Chef's Secrets – what you don't see, but you can taste
Small tips, big impact:
- Egg wash: more egg wash = darker colour
- Cutting: never just cut through puff pastry – press down with your knife so that you don't seal the layers
- Storage: the dough will keep for 3–4 days in the refrigerator
- Freezing: up to 3 months – defrost slowly in the fridge
- Salt & yeast: keep them separate – salt kills yeast cells
- Work with cold ingredients: always! This prevents the butter from melting
- Liquid: use cold liquid – otherwise you will activate the yeast too early
- Rising: in a steam oven at max. 30°C – over-rising = collapsed croissants and leaking butter
- Work surface: no flour! Flour between the layers makes the dough tough
- Brushing the dough: use a long-bristled brush – roll the dough around a rolling pin and brush the underside without turning the dough
- Baking: on baking paper, with the tip at the bottom – this will keep them nicely rolled
- Spacing: give croissants space – they grow during rising and baking
- Butter: top bakers choose butter with 84% fat content
- Folding: for 12 layers: 1x4 + 1x3 (or vice versa). For 16 layers: 2x4
Making your own croissants – the recipe
Makes approximately 15 croissants.
Ingredients
For the water dough (détrempe):
- 350 g flour type T55
- 150 g flour type T45
- 25 g fresh yeast
- 60 g sugar
- 12 g salt
- 250 g cold water
- 30 g milk powder
- 25 g unsalted butter (room temperature)
For the turning:
- 300 g unsalted butter (preferably 84% fat content)
For the eggwash:
- 1 egg
- 1 egg yolk
- 1 tablespoon milk
-
Step 1: The water dough (détrempe)
Place the flour, yeast, sugar, salt, milk powder and softened butter into the bowl of your mixer. Make sure the salt and yeast do not touch – salt kills yeast cells. Set the mixer to a slow speed with the dough hook and gradually add the water. Knead for 10 minutes at a medium speed until the dough is elastic and pulls away from the sides of the bowl.
Shape the dough into a ball, cover with cling film and leave to rise at room temperature for 1 hour.
Then, push out the air, roll out into a rectangle, wrap in cling film and leave to rest in the refrigerator for at least 2 hours.
![Croissants combos 1]()
-
Step 2: Work in the butter
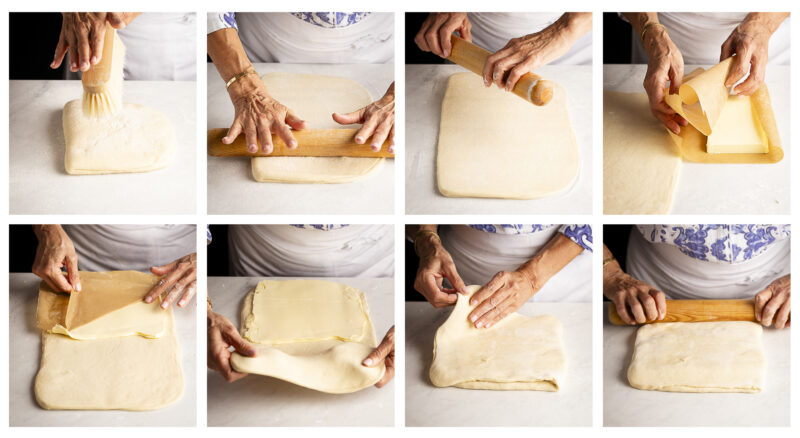
Lightly dust your work surface with flour, then roll out the dough into a rectangle that is approximately 6 mm thick and twice as long as it is wide. Brush off any excess flour.
Roll the butter out between two sheets of baking paper until it is half the size of the dough. Place the butter on the lower half of the dough and fold it over. Turn the dough a quarter turn, then roll it out again to a thickness of 6 mm. Always work in the same direction and apply equal pressure. Remove all flour after rolling out.
![Croissants combos 2]()
-
Step 3: First turn – 1x4
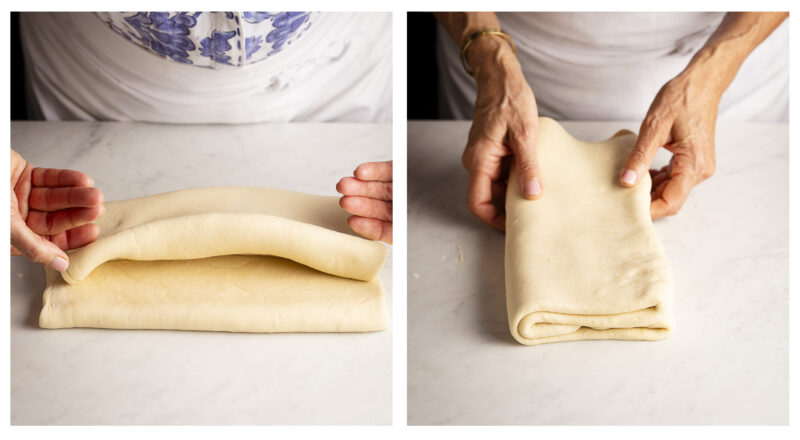
Fold the bottom third of the dough up to two-thirds of the way. Fold the top part down to just touch the edge. Then fold in half: you now have 4 layers. Wrap in cling film and let rest in the refrigerator for 1–2 hours.
![Croissants combos 3]()
-
Step 4: Second turn – 1x3
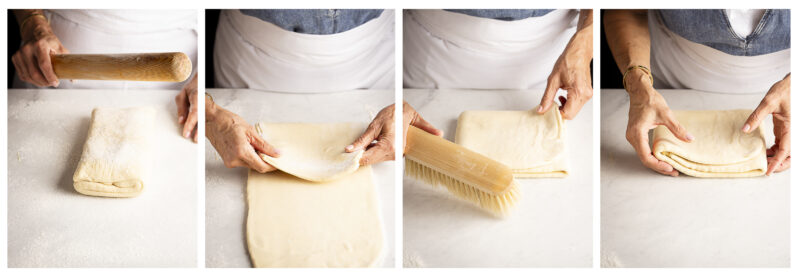
Place the dough with the fold on the right and roll out to a thickness of 6 mm. Fold the bottom third up, then the top third over it. You now have 3 layers. Wrap again in plastic wrap and leave to rest for 1–2 hours.
![Croissants combos 4]()
-
Step 5: Shaping the croissants
Roll the dough out into a square that is approximately 4 mm thick. Cut it into two equal halves, then divide these into triangles with an 8 cm base. Place the triangles on a baking tray, cover them, and leave them to rest in the fridge for 30 minutes.
Carefully stretch each triangle with your fingers. Hold the base of a triangle with one hand and place the fingertips of your other hand in the centre, close to the base. Move your fingers downwards from the centre. Make a small notch in the base, then roll up into a croissant. Make sure the tip is at the bottom. Place on a baking tray that is lined with baking paper.
Leave to rise in a warm place or in a steam oven at max. 30°C. Don't have a steam oven? Put a bowl of boiling water in a regular oven instead. Leave to rise until they have doubled in volume, which should take around 2 hours.
![Croissants combos 5]()
-
Step 6: Brush and bake.
Preheat the oven to 180°C.
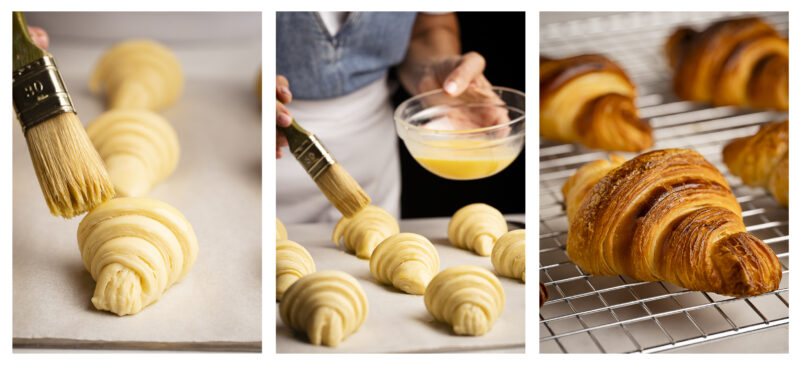
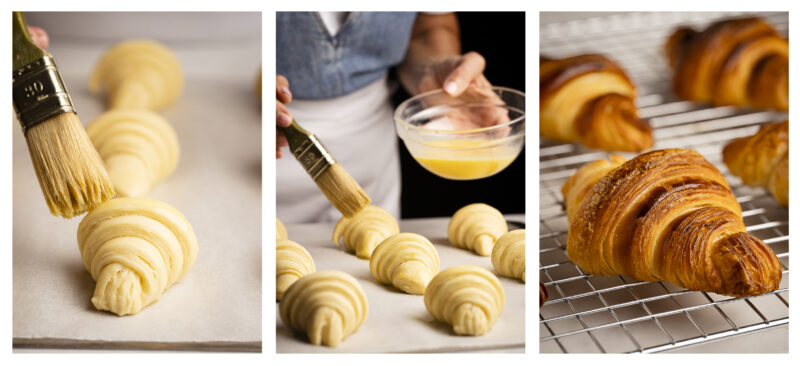
Beat the egg, egg yolk and milk together. Using a fine brush, carefully brush the mixture onto the croissants, avoiding the edges and taking care not to press down.
Bake for 12–15 minutes until golden brown.
Tip: Croissants are best enjoyed fresh from the oven, while they are still warm, fragrant and crispy.
![Croissants combos 6]()

